Argh, I can't adjust my frigging tick over....
This is a very simple "how to" free up a seized tickover adjuster. The bike shown is a 2003 model XB9R.
All of the screws you need to remove are Torx size 27 but make sure you keep the screws with the item they attach to: some of them have plastic washers, some are collared bolts etc, so you need to make sure they go back in the right place.
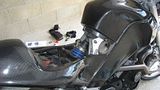
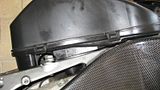
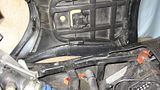
1) The tickover adjuster is hidden behind the left hand air scoop.
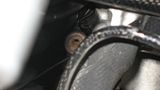
If your's has seized, the first thing to try is a squirt of penetrating fluid on the adjuster. If this doesn't work, or if you want to get under the airbox base for any other reason, the sequence is as follows.
2) Undo the two bolts inside the left hand air scoop:
3) Undo the third bolt at the far end of the air scoop and remove the air scoop:
4) Lift the back corners of the seat and remove the two bolts holding the seat on:
5) Slide the seat backwards and up to remove it from the bike:
6) Undo the two bolts at the back of the airbox cover:
7) Undo the two bolts at the front of the airbox and remove the airbox cover.
8) Remove the breater pipe from its "channel" in the top of the airbox:
9) Undo the six clips that hold the airbox top onto the base:
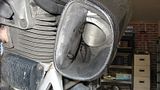
10) Remove the airbox top:
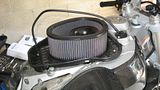
11) Lift out the air filter and clean up any oil and other junk in the airbox base, then undo the four bolts in the corners of the airbox base (you can see two of these bolts in the picture above).
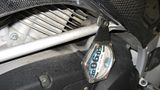
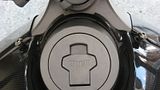
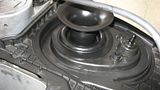
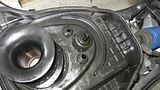
12) At the back of the airbox base there are two oil breather pipes and the air intake temperature sensor. The plastic curcular "funnel" is the velocity stack:
13) GENTLY lift the airbox base up, pursuading the upper sealing ring on the velocity stack through the airbox. Do NOT damage the sealing ring. Pull the two oil breather hoses through the bottom of the airbox:
14) If you need to fully remove the airbox base, undo the connector for the air intake temperature sensor.
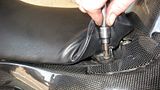
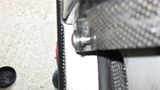
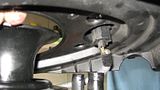
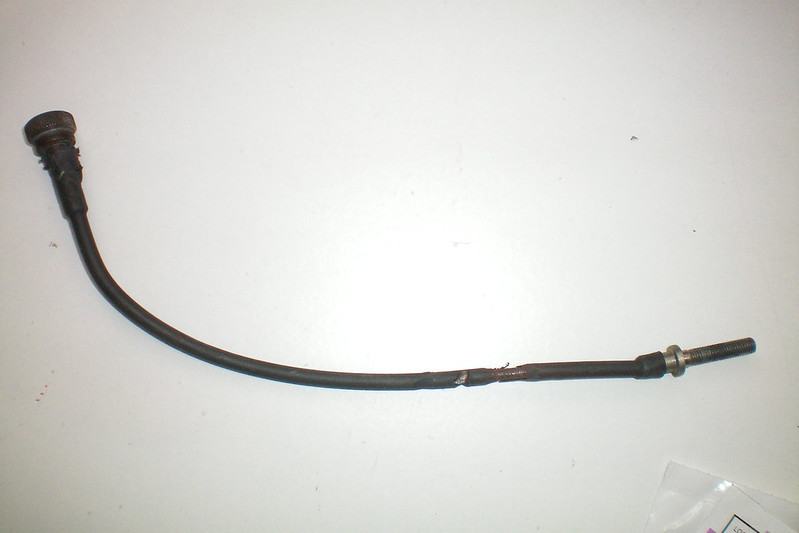
15) If you are tying to get to the tickover adjuster cable, the top two cables here are the throttle cables - the bottom one (with the spring on it) is the tickover cable:
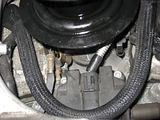
16) If you want to squirt any penetrating fluid onto the tickover cable, make sure you hold the little straw on your can of WD 40 etc - don't drop the straw!
17) For reassembly, reconnect the air intake temperature sensor and push the two oil breathers up through the holes in the airbox base. Do not push them up too far - they must not come up any higher than the bottom of the air intake temperature sensor.
18) GENTLY pursuade the velocity stack and the upper sealing ring through the hole in the airbox base. Again, do not damage it. Its easiest to start with the bit of the sealing ring directly behind the headstock and work your way round, pushing and pulling the airbox base a bit. Whilst you're doing this, keep an eye on the oil breather hoses - if you move the airbox base and pull them out, you'll have to start over again:
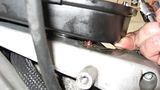
19) Replace the bolts in the aorbox base and retighten them. If they don't want to line up (these bolts are collared) put them in a little way and then hold the airbox base up so that the collars are sitting in the holes in the base, then tighten the bolts:
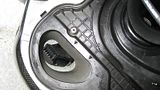
20) If there is a rubber intake tube in the hole here, just remove it and add it to your box of useless bits:
21) Replace air filter and airbox lid. Do up the airbox lid clips and reposition the breather hose than runs across the top of the lid. Replace airbox cover and do up the four bolts that hold it on.
22) Replace the seat, making sure that the tang on the bottom of the seat engages with the bracket on the subframe rail:
Do up the seat bolts.
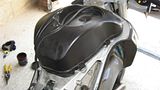
23) Replace the left hand air scoop and job done!


 [/url]
 [/url]
 [/url]
 [/url]
 [/url]