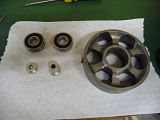
Bearing selectionSome early 9s had one bearing in the pulleywheel, 3203-2RS (also known as a 5203 with NTN - OE bearing manufacturer), a double row bearing 17 x 40 x 17.5mm (11/16") wide
Later 9s, 12s and 1125s have two bearings in the pulleywheel, two single row 6203-2RSs each 17 x 40 x 12mm wide.
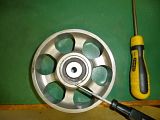
It is best to check which bearing you need by reading the number off the seal/race prior to disassembly.
Whatever you buy, you want the double sealed variety, i.e. 2RS (SKF) or RSR (FAG)
Fitting1. Remove the sprocket cover
2. Loosen axle pinch bolt
3. Loosen axle
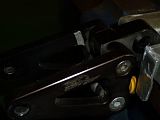
4. Remove tensioner fork (or Free Spirits Tensioner)
5. Remove tensioner wheel
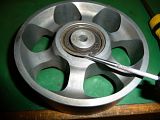
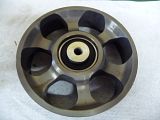
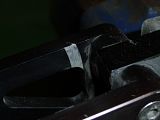
6. Remove circlip using a pair of flat bladed screwdrivers intially, levering the tail away from the tensioner wheel and prising it up out of the groover. Then, when more than half the circumference of the circlip is free, tug the tail with a pair of thin nosed pliers and tease out using the small flat bladed screwdriver.
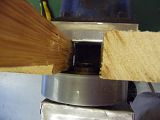
7. Using a socket (24mm is a handy size) that is small enough to fit into the bore and big enough to ensure that the aluminium spacers are not damaged, two equally sized blocks of wood and a vice, press the bearings out from non-circlip side. Be prepared for a cracking sound as the unlubricated bearing faces run along the inside of the tensioner wheel.
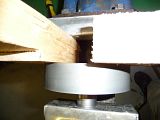
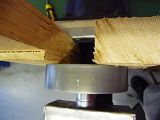
8. Continue to press out until; in the case of the later models, both bearings are out, and in the case of the older models, the single bearing is out.
9. Knock a small flat bladed screwdriver between the bearings (once out) to seperate them.
10. Knock the aluminium spacers out with a small punch. Not much energy required for this, careful not to damage them.
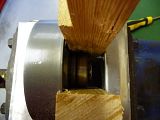
11. Coat the tensioner wheel bore with copa slip. Press the bearings back in. I used my famous brass studding that Jeff (ex-RAF), who worked in the Engineering Stores at uni gave me, the back of my rear wheel brearing press tool and one of the old bearings. Worth noting that old bearings can come in useful... If you had planned ahead with this job, you would have put the bearings in the freezer and the tensioner wheel in the oven to reduce the load needed to press the bearings in.
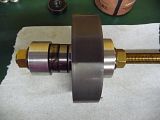
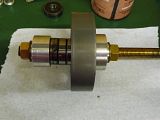
12. Apply some copa slip to the mating surfaces and press the aluminium spacers into new bearings, you can do this by hand, again you could have left these in the freezer... The longer of the two goes in from the circlip side of the wheel. Use a small hammer to knock them home if you are not very strong.
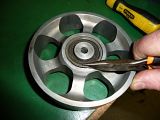
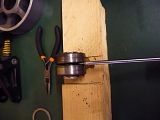
13. Replace the circlip. You will see that it is almost like a flat spring. The replacement of it is not the easiest method to describe; insert screwdriver into the srping to free one end, offer this end into the groove and work your way around the circumference pressing the clip down with a flat screwdriver or small round punch. You can help it in using a small flat bladed screwdriver to reduce the diameter of the clip. Continue until it is fully in the groove.
14. Put the tensioner wheel back in the fork or FS tensioner - Torque nut to 20-23 ft.lbs.
15. Put it back on the bike - Torque nuts to 30-35 ft.lbs. Replace footrest support on Uly and SS Long
16. Smear copaslip on mating surfaces of rear axle and tighten it up - Tighten axle to a torque of 23-27 ft.lbs, undo axle two full turns, re-tighten axle to a torque of 48-52 ft.lbs (no more or you will crush the bearing spacer and overload the wheel bearings)
17. Tighten pinch bolt to a torque of 40-45 ft.lbs
18. Replace the sprocket cover
FootnoteIt is worth noting that the tight clearances needed for mounting the FS Tensioner to get good wheel alignment and no clashing on the exhaust band results in little margin with worn bearings.


 Placed mine in the oven at about 200 degrees for 10-15 minutes. Bearings dropped right in.