Righto... here's a full write up of how to 'Bomberise' your Uly...
I'm sure there's things I've missed or forgotten, but the job itself is really straightforward AND you can go back to a stock Uly set-up easily too.
Parts you will need…
1. The seat from an XB12SS (£50-100)
2. The undertray from an XB12SS (the plastic 'tray that everything under the seat sits in) – (£20-40)
3. The tail light unit from any XB12 or XB9 (£60-100)
4. Metal Battery pan from an SS (not really essential) (£15-25)
5. Seat lock, cable and mount form an XB12 or XB9 (£10-20)
Total cost, about £250-ish
Tools you will need…
1. Usual tools – socket set, torx driver, screw drivers and a lot of patience ☺
2. Tap and Die set – you’ll need to tap a few treads into holes in the subframe – super easy! £10-15 off eBay for a tap and die set
3. Drill – you’ll need to mount the bank angle sensor – I chose to drill holes in the undertray to bolt it down – I’m sure there are equally good other ways to do it
4. Cable Ties - to hold the preload adjustment knob below the undertray
5. Stanly knife – you will need to cut a bit from the plastic underside of the seat – trust me it makes no difference to comfort – you’ll never notice it.
And here's how to do it… You'll see it's really just a case of undoing stuff and doing stuff back up again… It’s hard to break anything, just take your time – allow a half a day to go slow. A couple of hours if you know what you’re doing.
1. Remove the seat
2. Undo the bolts holding the ECM above the battery and leave it to flop about
3. Disconnect and remove the battery
4. Undo the connector to the wire running down to the rear brake (should be tucked in front of the battery area
5. Disconnect the wires to the indicators and tail light – this can be a bit of a fiddle – you can undo the bolts on the underside of the tail light/undertray area to kind of flop the mudguard down a bit to give you more access – if I remember correctly they’re bullet connectors, so you should just be able to pull them apart to disconnect them. The tail light just has a connector/clip to undo
6. Undo the torx bolts connecting any wires to the subframe (battery ground wire for example… I think there was another attached to the right-hand side subframe in front of where the fuse box is)
7. Undo the bolts that mount the preload adjustment knob for the rear shock (left-hand underside off the subframe)
8. Undo the torx screw holding the rear shock reservoir in place
9. Undo the bolts holding the rear brake reservoir in place
10. Undo the metal bracket holding the bank angle sensor (part of the seat lock mechanism metal bracket)
11. Unbolt the subframe from the mounting lugs on the main frame – there’s 2 each side and probably best to ask someone to help hold the subframe in place as you do it
You should now be able to remove the whole subframe – go slowly in case you see anything else still connected.
You now need to prep the ‘new’ subframe. You are basically going to separate the subframes or ‘seat rails’ from the undertray.
1. Undo and torx bolts connecting the metal battery pan to the subframe and remove it.
2. Undo the bolts connecting the triple-tail unit to the seat rails.
3. Basically just undo anything that connects to the seat rails themselves.
4. Once you have the seat rails free, you’ll need to tap a thread for the bolts that will connect the XBS tail light unit and the protruding lugs middle of the seat rails – these are where your new SS seat will catch underneath, so you’ll need to screw bolt into them. In both cases, there’s holes already, just no thread inside. Just get the right bit from your tap and die set and gently screw it in... out a bit, in further, out a bit… in further still… you get the idea. In 2 mins you’ll have them done. Easy.
5. Slot the seat rails up against the sides of the XB12SS undertray, and bolt them up to the XB12 /XB9 tail unit, using your newly threaded holes. New subframe done!
6. Insert some bolts into the lugs half way along the seat rails so your SS seat catches has something to hook under
7. Insert your SS battery pan
8. You can now attach your subframe to the bike again.
9. Mount the seat lock and catch - you need to dismantle the actual catch mechanism bit itself from the metal bracket the stock set-up has as the SS undertray has a moulded bit that you attach the catch too (see the pics below)
10. Connect the rear brake wire
11. Connect your indicators and tail light wires
12. Re-attach the grounding wires to the seat rails (forward of the fuse box and the battery ground wire)
13. There’s much less space under your seat now, so here’s how you pack it all in…
14. Your ECM will have to tuck down in front of the battery
15. Place the fuse box kinda back where it was – now try to put the SS seat on and you’ll see where you need to cut out a section of the underside of the seat (again images below)
16. Redo the screw holding the little tag that secures the rear shock reservoir in place
17. Reattach the brake fluid reservoir
18. You should have everything replaced and reconnected no and only the bank angle sensor to fit – I chose to fit mine in the area behind the battery. You will need to secure it in place – other wise it can roll over, make the bank angle sensor think you’ve binned the bike and it will kill the engine… do it’s job, in other words. I drilled a couple of holes through the undertray and bolted the sensor down.
And that’s basically it. I then removed the beak, fit shorter lower Renthal bars, paint job, decals, coated the wheels black etc etc….
I hope that’s all useful to someone!
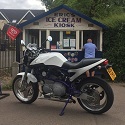
Here's some pics (of my bike post-bomberising)


Here's where you mount the preload adjuster...

And here's the chunk you need to cut out from the seat backing to allow for the fuse box


 .....just buy an STT