It is currently 21 Feb 2025 22:57

All times are UTC


Post new topic  Reply to topic  [ 1154 posts ]  Go to page Previous 161 62 63 64 6577 Next
Author Message
PostPosted: 02 May 2013 22:32 
Offline
Site Admin
User avatar

Joined: 15 Apr 2009 17:17
Posts: 8643
Location: Manchester
Yeah, right lOl

_________________
Mithered ta death.
92 MB
96 S2T
98 S1W
00 M2
01 X1
03 P3
10 CR


Top
PostPosted: 03 May 2013 08:29 
Offline
User avatar

Joined: 07 Nov 2011 18:10
Posts: 4230
Current ride: Buell ulysses
Location: Telford
:hehe:

and for my next trick
http://www.youtube.com/watch?v=eC6vQQUD_lI

_________________
Buell Ulysses XB12X 06/08


Top
PostPosted: 03 May 2013 15:26 
Offline
A grey tide eel
User avatar

Joined: 07 May 2009 12:18
Posts: 1853
Location: Bristol
Looks like it might get complicated

http://www.youtube.com/watch?v=lOkw1lMGsfw

_________________
Buell S1
Buell S3 (Topless for now)
Buell XB12S
Piaggio X8 400ie
Yamaha XTZ750 Super Tenere (x2)
Suzuki GSXR750WR
BSA B441VS
FJR1300


Top
PostPosted: 03 May 2013 20:18 
Offline
User avatar

Joined: 06 May 2009 21:29
Posts: 1485
That's cool.

Andy


Top
PostPosted: 06 May 2013 20:09 
Offline
has it got a pulse?
User avatar

Joined: 06 May 2009 15:47
Posts: 2565
Current ride: FUBAR...Enough said!
Location: Reading
That is a quality job Andy 8-)

_________________
FUBAR pilot

You only need two bikes in life-an S1 and a Multistrada!


Top
PostPosted: 25 Jun 2013 11:49 
Offline
A grey tide eel
User avatar

Joined: 07 May 2009 12:18
Posts: 1853
Location: Bristol
Finally the Daywalker tribe have moved and I have some space to play. So it is a case of watch this space for updates as a man cave or two gets sorted out.
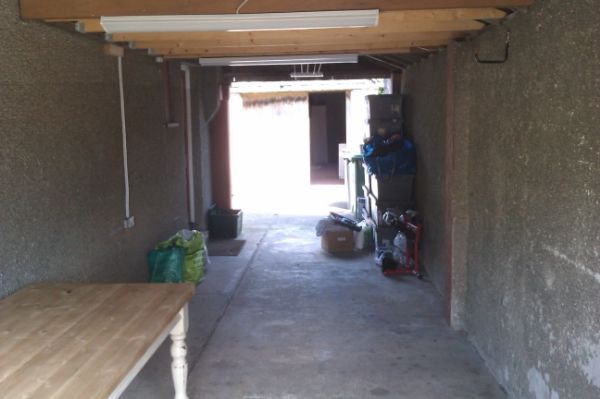
Here is the empty spaces I have. This runs along the side of the house and is effectively a garage but open at the end. The plan is to have a door at the other end and use this for bike parking. The other garage/workshop can be seen behind.
Image

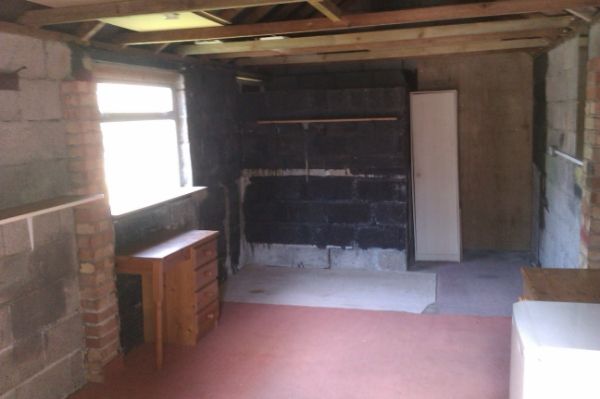
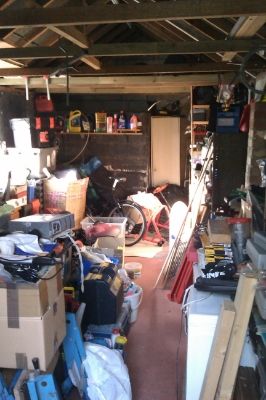
This is the interior of the garage/workshop. Owner left a fridge which was nice but needs chucking as it can't keep the beer really cold.
Image
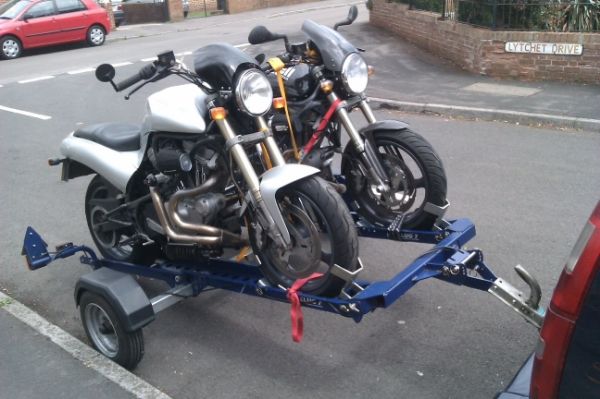
Here are the first two occupants of the covered parking being offloaded!
Image
Further updates to follow.

_________________
Buell S1
Buell S3 (Topless for now)
Buell XB12S
Piaggio X8 400ie
Yamaha XTZ750 Super Tenere (x2)
Suzuki GSXR750WR
BSA B441VS
FJR1300


Top
PostPosted: 14 Jul 2013 16:30 
Offline
User avatar

Joined: 06 May 2009 21:29
Posts: 1485
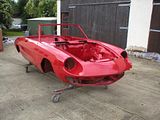
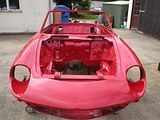
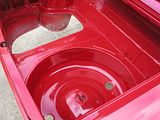
The Alfa is starting to get somewhere now, my hand goes up here as I neither have the talent or the time to do this good a job and I subbed this part out.
Image


Image

Image

Image

It should start to come together a bit now.

andy


Top
PostPosted: 20 Aug 2013 21:50 
Offline
Milf Hunter
User avatar

Joined: 06 May 2009 16:47
Posts: 4643
Current ride: '98 S1
Location: Wessex
Well, I finally found time to fit my new Mikuni HSR42 yesterday.
Attachment:
Mikuni 001.jpg
Mikuni 001.jpg [ 4.02 MiB | Viewed 2933 times ]

Although it did fit straight on, after swapping out the choke cable internals, it's not quite the whole picture, as, if I'd remembered to read previous posts, I'd have known that although this is the "Easy Kit", the cables are still slightly too long. I thought that this was down to my cables being stretched originals (15 years/ 35000 miles) but others who have gone this route before have learned the same thing. I'll make the spacers tomorrow. I could probably use a new throttle assembly, if such a thing exists, as it's pretty stiff these days.
Tonight, I stayed on at work and made a new spacer for the race filter that I am currently running. I'm gonna make a "Force" type elbow, but I haven't got time right now.
The CV carb must have deeper drillings that the adaptor which came with the kit, as when I tightened up the allen screws, they bottomed out leaving a 6mm gap at the spacer behind the filter back plate.

Attachment:
Mikuni 006.jpg
Mikuni 006.jpg [ 3.33 MiB | Viewed 2933 times ]


As per my usual luck, we didn't have anything near the size I needed in the scrap box at work, so I had to make it from a lump of ally that was laying around.

Attachment:
Mikuni 017.jpg
Mikuni 017.jpg [ 10.5 KiB | Viewed 2933 times ]


The original one is made from thick wall tube, simply sawn off on a chop saw.

I drew around the original, then used a transfer punch to get my hole centres. You don't need the fourth hole with the Mikuni.
I used the bandsaw to hack it out, but we only had a fine blade, so it took a while.
Attachment:
Mikuni 014.jpg
Mikuni 014.jpg [ 9.28 KiB | Viewed 2933 times ]


I held it in the mill to whittle it down a bit more.....

Attachment:
Mikuni 013.jpg
Mikuni 013.jpg [ 13.72 KiB | Viewed 2933 times ]


Then drilled the holes 15mm deep and tapped them M6.

Attachment:
Mikuni 012.jpg
Mikuni 012.jpg [ 13.67 KiB | Viewed 2933 times ]


I countersunk the original spacer, then used some countersunk screws to fix the new block to the old one. This was the easiest way to hold it in the lathe.
Attachment:
Mikuni 011.jpg
Mikuni 011.jpg [ 7.42 KiB | Viewed 2933 times ]


Using this method, I could face, turn and bore the new spacer in one hit, leaving only the back face to finish.
Attachment:
Mikuni 021.jpg
Mikuni 021.jpg [ 14.52 KiB | Viewed 2933 times ]

Attachment:
Mikuni 025.jpg
Mikuni 025.jpg [ 41.59 KiB | Viewed 2933 times ]

Once finished to size on bore and diameter, I removed the original and turned it around to face it to size.
Attachment:
Mikuni 042.jpg
Mikuni 042.jpg [ 928.38 KiB | Viewed 2933 times ]

After that, all I had to do was drill out the holes to a clearance size and give it a little polish...........
Attachment:
Mikuni 024.jpg
Mikuni 024.jpg [ 26.14 KiB | Viewed 2933 times ]


I fired her up tonight and she was ticking over almost straight away. I left her ticking over while I pumped up the rear tyre (with a bike pump) and then took her for a trial run out to Bere Regis and she is running like a bat out of hell. She pulled straight up to 6500rpm without blinking in top, from a 40mph roll on. She used to do that, when I first rode her,10 years ago.:yup:

I'll check the tyre pressures again tomorrow, on the way to work. ;)

_________________
I started out with nothing and still got most of it left.


Top
PostPosted: 20 Aug 2013 22:53 
Offline
proff. patpending
User avatar

Joined: 06 May 2009 20:20
Posts: 14705
Current ride: Victoria Sponge
Location: Bristol - Gateway to all things good
Legend...

_________________
08 Specialized Langster


Top
PostPosted: 22 Aug 2013 13:50 
Offline
has it got a pulse?
User avatar

Joined: 06 May 2009 15:47
Posts: 2565
Current ride: FUBAR...Enough said!
Location: Reading
Happy days 8-)

_________________
FUBAR pilot

You only need two bikes in life-an S1 and a Multistrada!


Top
PostPosted: 24 Aug 2013 11:24 
Offline
A grey tide eel
User avatar

Joined: 07 May 2009 12:18
Posts: 1853
Location: Bristol
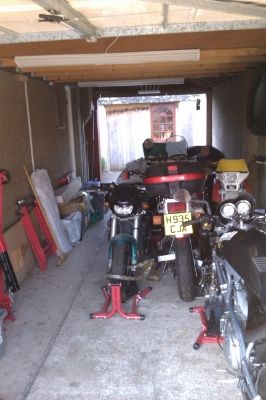
We have moved in the bikes.
Image

And the workshop needs sorting out ready for the machines that are arriving this weekend. Will just have to move everything over to one side to get the machines in and then properly plan it out.

Image

_________________
Buell S1
Buell S3 (Topless for now)
Buell XB12S
Piaggio X8 400ie
Yamaha XTZ750 Super Tenere (x2)
Suzuki GSXR750WR
BSA B441VS
FJR1300


Top
PostPosted: 24 Aug 2013 11:34 
Offline
User avatar

Joined: 10 Mar 2010 20:06
Posts: 1016
Current ride: 2004 Buell XB 12s
Location: Schoorl ,Netherlands
do yourself a favour and put good locks on the workshop! :x :|

_________________
The sound of a V-twin engine braking is music to my ears!!


Top
PostPosted: 24 Aug 2013 21:13 
Offline
User avatar

Joined: 15 May 2009 17:34
Posts: 3567
Location: The borders of insanity
spondon440 wrote:
The original paintball gun is legal and produces less than 12ft llb and we didn't modify any part that would increase this power.
Use pepperballs - it wont matter what the ft-lbs are.

_________________
Sept 2017. Email will find me.


Top
PostPosted: 25 Aug 2013 21:49 
Offline
Milf Hunter
User avatar

Joined: 06 May 2009 16:47
Posts: 4643
Current ride: '98 S1
Location: Wessex
I finally got around to making the cable spacer for my throttle tonight.
I used Pash's drawing.
Attachment:
Mikuni 056.jpg
Mikuni 056.jpg [ 420.68 KiB | Viewed 2859 times ]

Turning the part was straight forward. I flat bottomed a 5.3mm drill to finish the larger hole.
I could have cut the slot with a hacksaw, but it would have needed filing to open it up to the cable size, so luckily, I found a slot drill to do the job.
Attachment:
Mikuni 050.jpg
Mikuni 050.jpg [ 29.7 KiB | Viewed 2859 times ]

You have to take fairly small cuts, as they snap like carrots.
I deburred it with a needle file and then gave it a polish.
Attachment:
Mikuni 053.jpg
Mikuni 053.jpg [ 503.25 KiB | Viewed 2859 times ]

Attachment:
Mikuni 054.jpg
Mikuni 054.jpg [ 543.99 KiB | Viewed 2859 times ]

I'll fit it tomorrow.

_________________
I started out with nothing and still got most of it left.


Top
PostPosted: 25 Aug 2013 22:08 
Offline
proff. patpending
User avatar

Joined: 06 May 2009 20:20
Posts: 14705
Current ride: Victoria Sponge
Location: Bristol - Gateway to all things good
Hope it fits :run:

_________________
08 Specialized Langster


Top
Display posts from previous:  Sort by  
Post new topic  Reply to topic  [ 1154 posts ]  Go to page Previous 161 62 63 64 6577 Next

All times are UTC


Who is online

Users browsing this forum: No registered users and 4 guests


You cannot post new topics in this forum
You cannot reply to topics in this forum
You cannot edit your posts in this forum
You cannot delete your posts in this forum
You cannot post attachments in this forum

Search for:
Jump to:  
Powered by phpBB® Forum Software © phpBB Limited